Cut it up. Deep Revision: Part 4.

This is Part Four of a 5-part tutorial called Deep Revision. This series was designed to help writers prepare for The Little Bird Writing Contest.
Read the rest of the Deep Revision series here:
— Part One — Part Two — Part Three — Part Four (below) — Part Five —
One of the hardest things about attempting revision is the feeling of calcification that encloses a piece of writing once it’s been typed. It’s very convincing.
It gets even more solidified once you print it. It feels so good to see the printed pages, though, doesn’t it? Printing makes it feel real.
The problem is, to your lovely eyes, a printed first draft looks exactly like a printed polished final draft. It’s the same ink, the same font, the same line spacing. The printed draft can convince you that it is rock solid.
But it is not rock solid. It’s a draft. And you must be strong enough to break it like a geode to find the crystals within.
(Was that too much?)
Today’s homework will help you rediscover something new about that beautiful, exciting, possible story that is living inside your printed draft. It will also help you give yourself permission to change what’s there already, and make your story even more itself.
In other words, you’re going to break your story apart... without breaking it.
Homework:
You will need:
A printed copy of your story
A large, flat space (like the floor)
Three or four different colours of highlighters
Scissors
Tape
1. Spread all the pages out - one by one, so they aren’t overlapping - over a big table, kitchen counter, or (my favourite), the floor.
2. Think of the cornerstone elements that are particular for your story – characters, settings, time (if you use flashbacks), etc.
Use the highlighters to mark scenes and sections by colour, so you can see a visual map of your narrative structure. For example, if your story focuses on two main characters, you would highlight one character’s sections using yellow, and the other’s with blue. Or you can focus on prose: pink for scenes, green for exposition. Use your discretion and intuition here: only you know the strongest elements of your own story, and what needs the most balance.
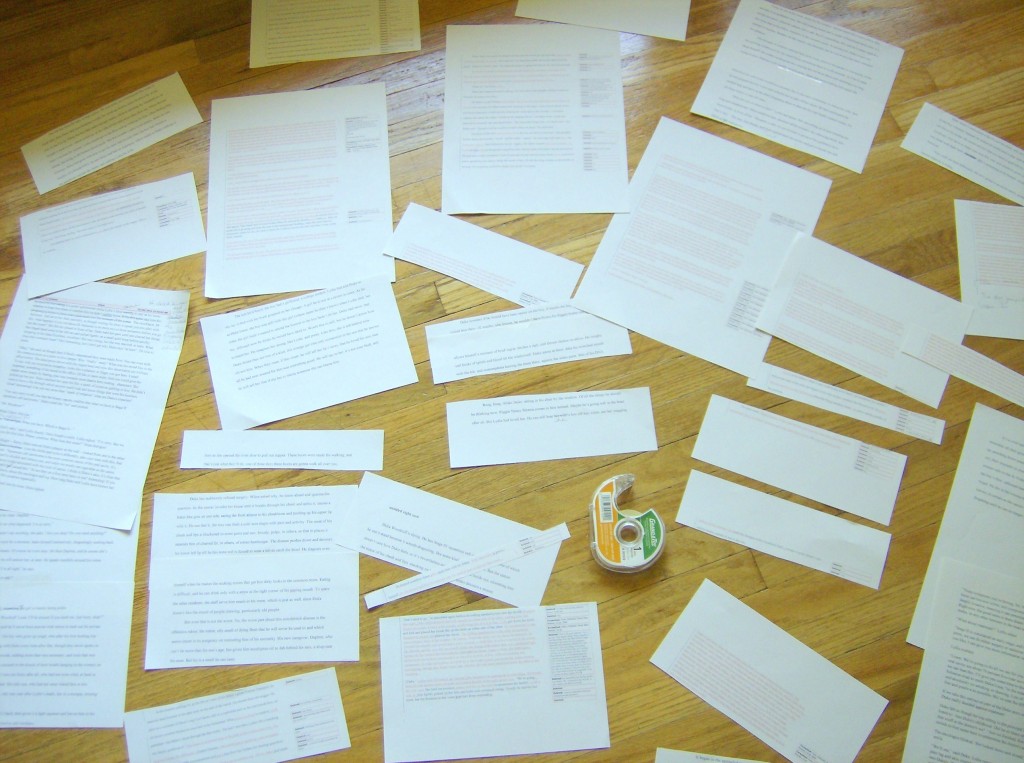
3. Cut your scenes apart with scissors. Cut your paragraphs apart. This can be really fun or really scary, depending on who you are. Start with the problem areas – cut decisively and thoughtfully. I suppose you could also cut experimentally!
Ultimately, know that it’s all going to be there for you later. Your story isn’t going anywhere; you have the master file saved on your computer. So what’s the harm? CUT IT ALL UP.
It will look something like this*:

4. Step back for ten minutes. Make a cup of tea. Eat a few graham crackers.
5. Go back to your story puzzle on the floor, and see what happens when you move scenes around. Things you may notice as you shift the paper slices (this is not an exhaustive list, but it should pique your interest):
there’s a way more interesting place to begin the story
one character needs more page time to create balance in the story
your scenes are too short; you can push them further
the ending could really be at the beginning: in other words, you could structure your story in a better way
certain scenes are enhanced when they are placed directly next to other scenes – an emotional punch can be created without you mediating it
there is too much exposition and not enough scene
when taken out of context, there are parts of your story that you don’t love
you want more dialogue in there
most of the story takes place in flashback
there’s more drama when you take out your transitional paragraphs
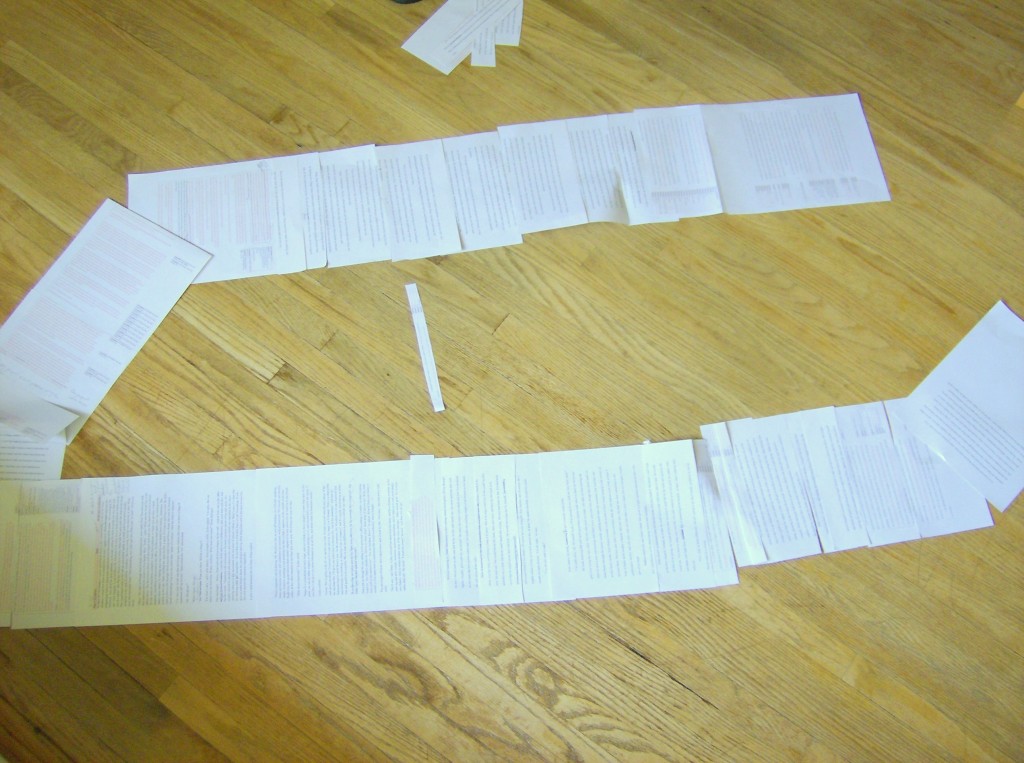
6. A new shape will start to form. Move the pieces into a new order, and tape them so they snake together in a scroll across the floor. You don’t have to move scenes just because you’ve cut them apart. And you don’t have to keep everything, either – you can leave parts out if they feel less than necessary. Just give your story structure again by taping it together.
You may also want to make notes on the scroll about new scenes that you want to write.
When you’re finished it should look like this*:

7. Go back to your computer and retype your adjusted draft. From scratch, please. I know that a lot of it is already written and won’t change. But trust me, your voice will be even more controlled, confident, and seamless when you type your story out again, all at once, on a new blank document.
You can consult your scroll as you type and write, but really try to feel the new version coming out as itself, and not just a transcription of what has come before. (see Deep Revision: Part 3 for a reminder about this process).
Now take a rest. That was a big deal.
Next week is the final installment of this series. There are still three weeks left to work on your Little Bird story entry. Enjoy this process, and let me know how it goes with the scissors and tape in the comments below, okay?
xo,

* Geode-cracking revision photos courtesy of Steph VanderMeulen, from her work with TA Gabriele Kohlmeyer, Summer 2012.
Read the rest of the Deep Revision series here:
— Part One — Part Two — Part Three — Part Four — Part Five —

12 comments
Leave a comment